
We have all taken blurry photos from time to time, but the good news is that you can use Lightroom’s magic to fix them. Images can become blurry due to a variety of factors, including shaky hands, low light, or even fast-moving subjects. In this guide, we will show you how to use Lightroom to restore clarity and sharpness to your photos.
It is not as hard as you may think to fix blurry photos in Lightroom. Let us look at some simple techniques that will turn your blurry photos into crisp, clear pictures.
Method 1: By Using Lightroom Sharpening Tools
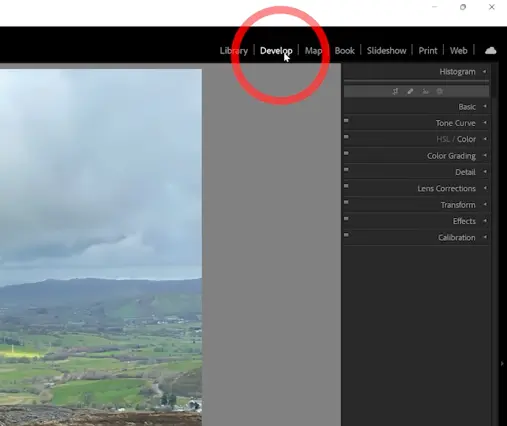
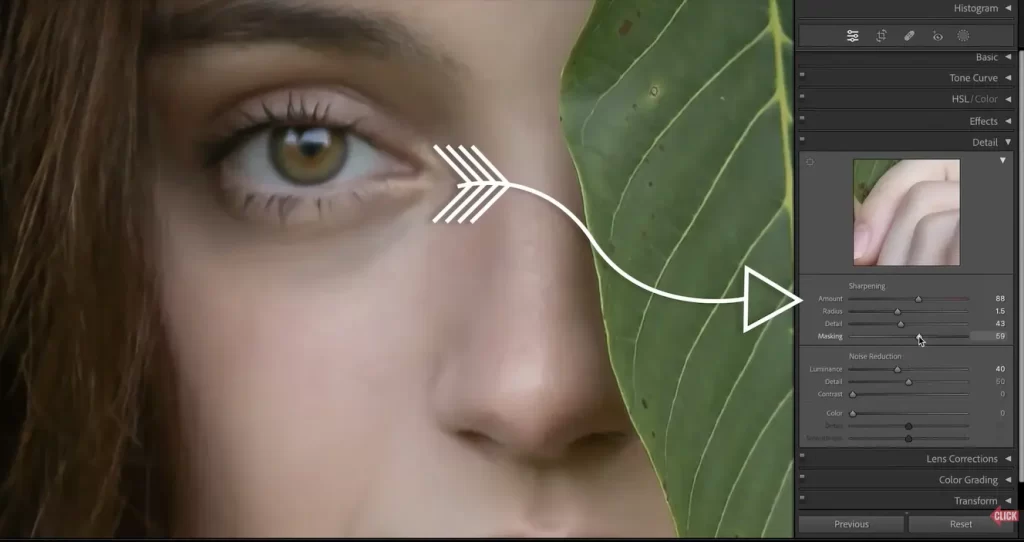
You can adjust how much sharpening is applied to your images in Lightroom’s Sharpening panel. To get to this panel, select the Develop module, then scroll down to the Detail panel on the right-hand side. From here, you can adjust how much sharpening is applied to your images.
Adjusting the Amount Slider
The most important tool in Lightroom for sharpening is the Amount slider, which sets the sharpening effect’s strength and can significantly improve the clarity of your images. Dragging the Amount slider to the right sharpens while dragging it to the left reduces sharpening. However, be careful not to over-sharpen—doing so can introduce noise and artifacts.
Fine-tuning with the Radius Slider
Adjust the Radius slider to the desired level of detail enhancement; smaller values are usually better for portraits or images with fine textures, while larger values are better for landscapes or images with larger, well-defined elements. A higher radius value will affect larger areas of your image, while a lower radius value targets smaller details.
Managing Detail and Masking
The masking slider controls the areas of your image that will be affected by sharpening; higher values ensure that only distinct edges are sharpened, while lower values apply sharpening to a broader range of details. Holding down the Alt/Option key while adjusting the Masking slider allows you to see a black-and-white preview, which helps you refine the sharpening effect. The Detail slider determines the amount of sharpening applied to smaller details in your photo. Moving it to the right enhances the sharpness of fine lines and textures while moving it to the left reduces the sharpening effect on these areas.
Tips:
- Begin with subtle adjustments and gradually increase them. You can always fine-tune it later.
- To see the difference clearly, zoom in on your photo while using these sliders.
- Use the “/” key on your keyboard to toggle between the original and adjusted views. This helps you compare and refine your work.
- Another valuable trick is to hold down the Alt key (on Windows) or the Option key (on Mac) while using the sliders. This action temporarily turns your photo black and white, making it easier to see any changes you make.
- Remember, it’s always better to apply sharpening in moderation and avoid overdoing it, as it can lead to unnatural or artifact-laden results.
Method 2: By Using the Clarity Tool
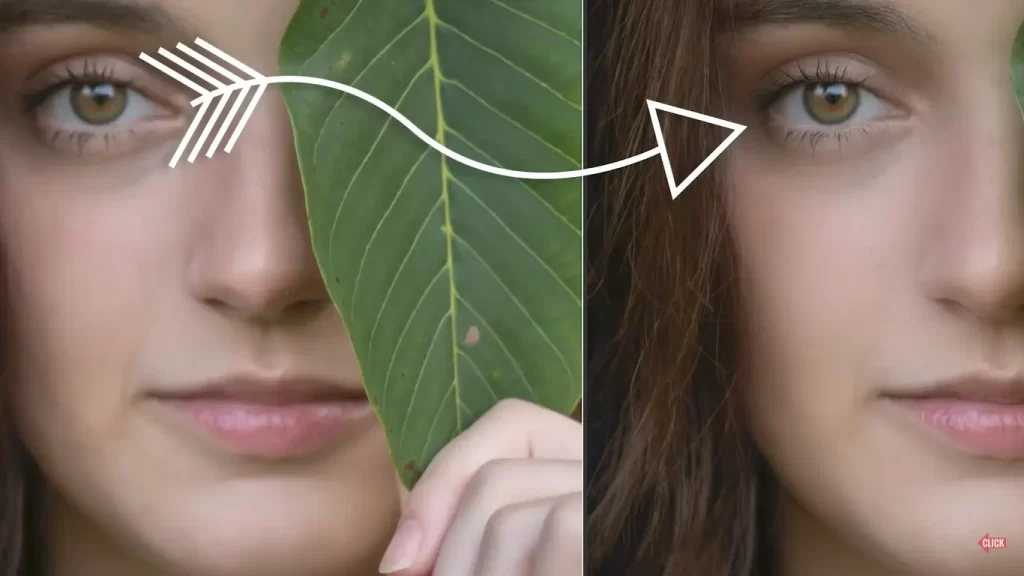
For me, the best way to correct blurry photos is to use Lightroom’s Clarity tool, which can greatly improve the overall sharpness and details in your images. Here are the steps I use to use the Clarity tool to fix my fuzzy photos:
- Launch Lightroom and import your grainy image into the Develop module, which houses all of Lightroom’s editing features.
- Make some basic tweaks to your shot before using the Clarity tool. To make sure the overall tonal balance is correct, I usually start by changing the exposure, contrast, highlights, shadows, and whites.
- Where to find the Clarity tool: In Lightroom, the Clarity tool is a slider with the label “Clarity” that is located in the Basic panel of the Develop module.
- Use the Clarity adjustment: The Clarity slider has a zero default value. To improve the sharpness and clarity of your hazy picture, slide the slider to the right. Positive values will make the clarity more pronounced, while negative values will make it less so.
- Use the Masking feature. The Clarity tool adjusts the clarity of the entire image. But sometimes you want to apply the clarity adjustment to certain areas only. To accomplish this, move the Clarity slider while holding down the Alt/Option key. This activates the masking feature, which limits the clarity adjustment to the areas that have changed the most.
- Fine-tune the clarity adjustment: After you have applied the first clarity adjustment, carefully review your shot and assess the changes you made. Occasionally, a minor adjustment can yield significant results; to see more details, I suggest zooming in to 100% or 200%. Then, make more adjustments to the Clarity slider until you are happy with the sharpness and clarity of your image.
- To prevent your photo from appearing overly processed or unnatural, it is important to balance the clarity adjustment with other settings, such as contrast, saturation, and sharpness. The Clarity tool can add a lot of detail to your picture.
Method 3: By Using Radial And Graduated Filters
Here’s how I use radial and graduated filters in Lightroom to fix blurry photos: These useful tools let me make targeted adjustments to specific areas of an image, like sharpness, clarity, and contrast. I frequently find that using them in Lightroom can be very helpful in fixing blurry photos.
- Here’s how I use radial and graduated filters in Lightroom to fix blurry photos: These useful tools let me make targeted adjustments to specific areas of an image, like sharpness, clarity, and contrast. I frequently find that using them in Lightroom can be very helpful in fixing blurry photos.
- Graduated Filter: This tool is great for adjusting blurriness in a particular area of an image that has a clear transition, like a skyline or horizon. It allows me to make adjustments to one side of the image without affecting the other, so I can bring out details and sharpness only in the blurry area and leave the rest of the image intact. I can fine-tune adjustments like sharpness, clarity, and contrast to restore the necessary clarity in that specific area.
The key point to remember is that the radial and graded filters both operate based on applying adjustments gradually and under control. This allows me to make minor tweaks to particular regions, which makes the image look more realistic and crisper overall.
To get the best results, I also frequently combine the radial and graduated filters with other Lightroom tools, like the noise reduction and sharpening options. These tools help me further bring out the sharpness of various elements and minimize any noise that might be in the picture.
Method 4: By Using Presets
A preset is essentially a pre-defined set of modifications that can be applied to a photo with a few clicks; presets can be developed by the user or acquired from various sources. Presets are a valuable tool in Lightroom that can assist in correcting blurry photos quickly and effectively.
Presets are a great time-saver when it comes to sharpening and clarifying blurry photos. Rather than having to manually adjust multiple settings like sharpness, clarity, and noise reduction, you can apply a preset that has been specifically created to improve the sharpness and clarity of a blurry image.

To use presets in Lightroom, follow these simple steps:
- Open your blurry photo in the Develop module of Lightroom.
- On the left-hand side panel, you will find the “Presets” tab. Click on it to expand the presets panel.
- Lightroom comes with a set of default presets, but you can also create your own presets or download them from various websites. To apply a preset, simply click on its thumbnail in the preset panel.
- After applying a preset, you can further customize the settings to suit your specific needs. Adjustments like sharpening, noise reduction, and clarity can be fine-tuned to achieve the desired result.
- If you are not satisfied with the results of a preset, you can easily remove it by selecting the photo and clicking on the “Reset” button located at the bottom right corner of the Develop module.
Method 5: By Using Third-Party Plugins
Lightroom is a very effective tool for sharpening photographs, I must say, but sometimes you may need a little extra assistance to get the sharpness you want. This is where third-party plugins come into play.
I have experimented over the years with several third-party sharpening plugins, and I have to say, they have been nothing short of revolutionary. These plugins offer sophisticated algorithms and functionalities that can elevate your grainy photos to a whole new level. Below are some of my top picks, which I heartily recommend trying:
- Nik Sharpener Pro: One of my personal favorites, this plugin is well-known for its accurate sharpening features. It provides a variety of sharpening choices, including output sharpening, creative sharpening, and selective sharpening. The user-friendly interface makes it simple to navigate and apply adjustments.
- Topaz Sharpen AI: Whether it is a landscape or portrait shot, Sharpen AI can produce amazing results by using artificial intelligence to analyze and improve the sharpness of your images. It does a wonderful job of restoring small details and minimizing blurriness.
- Imagenomic Noiseware: Although its primary purpose is to reduce noise, noiseware can also improve overall sharpness. It does this by intelligently identifying and suppressing noise while maintaining crucial features, which makes the images cleaner and sharper. It works especially well at reducing noise in high-ISO or long-exposure shots.
Understanding the cause of blurry photos
Here are some frequent culprits that might create blurry images, and knowing these causes can help us prevent and fix fuzzy photos in Lightroom:
- Camera Shake: Camera shake, which occurs when the camera moves slightly during the exposure process and results in a lack of clarity, is one of the most prevalent reasons for blurry images. To prevent camera shake, use a tripod or steady the camera against a sturdy surface.
- Focus Issues: A soft or out-of-focus image can arise from the camera not being able to focus on the subject. To address focus problems, make sure your autofocus settings are adjusted appropriately and, if needed, think about utilizing manual focus techniques.
- Motion Blur: Motion blur can happen while shooting at a slow shutter speed or when capturing moving subjects. To reduce motion blur, use a faster shutter speed, track moving subjects with continuous focusing or utilize tracking mode, and think about employing panning techniques to capture motion in a more controlled way.
- Depth of Field: Shallow depth of field can also lead to blurriness; when shooting at wider apertures, the depth of field narrows and parts of the image appear out of focus. This effect can be intentionally and creatively used to isolate a subject, but it can also result in unintentional blurriness. Change the aperture settings to control the depth of field, and think about using focus stacking for more control over the sharpness.
- Lens Aberrations: Some lens aberrations can also lead to blurry images; lens distortion can disrupt the overall sharpness and straightness of lines; and chromatic aberrations can result in color fringing around the edges of objects. Lens correction tools in Lightroom can help address these problems.
Conclusion: How to Fix Blurry Photos in Lightroom
Finally, by following the thorough tutorial offered in this blog post, you have gained invaluable insight into the potent tools and techniques available within Lightroom to rescue and sharpen your images. Learning how to fix blurry photos in Adobe Lightroom is a valuable skill that can salvage and enhance your captured moments.
Photographers who know how to fix blurry photos in Adobe Lightroom can save shots that would have been considered unusable otherwise. The sharpening tools, clarity adjustments, and precise fine-tuning that Lightroom offers provide a flexible way to add definition and clarity to your images.
Lightroom’s flexibility allows you to experiment, refine, and ultimately achieve crisp and detailed images that meet your creative vision. As you incorporate these techniques into your editing workflow, keep in mind that every photo is different, and there may be a combination of adjustments that works best for different situations.
Keep checking back for more insightful tutorials and tips to improve your Adobe Lightroom skills! Photo editing is a lifelong journey, and every project you take on will give you the chance to hone your skills and create visually stunning, sharp images. Explore the creative potential of Adobe Lightroom and see how your once-blurry photos become sharp, captivating works of art!