Smooth skin in photographs can make a big difference, especially in portraiture, where it helps create a polished and professional look. Here’s an article that will walk you through the process of removing all the pimples and blemishes from your photos while utilizing Adobe Lightroom, a powerful photo editing program that is renowned for its user-friendly features.
Step 1: Removing Spots with the Bandage Tool
The first step in achieving clear, flawless skin in Lightroom is to manually erase any visible pimples or spots so that subsequent retouching and skin smoothing settings produce better results. The Lightroom Bandage Tool can be thought of as a tiny spot eraser for your photo’s skin; it helps remove any small marks or imperfections, leaving your skin looking clean and smooth.
- Click on the Bandage Tool icon. Sometimes, it might be called “Spot Removal” in Lightroom.
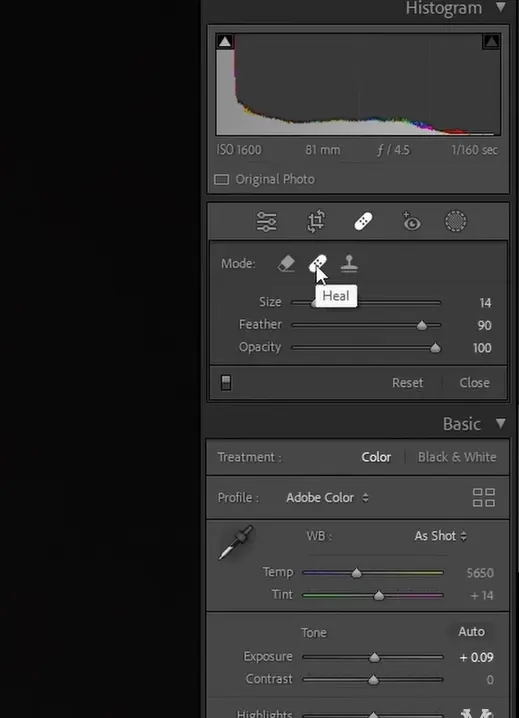
- Select the heal bandage and adjust its settings, like size, etc. depending on the size of the pimples and blemishes.
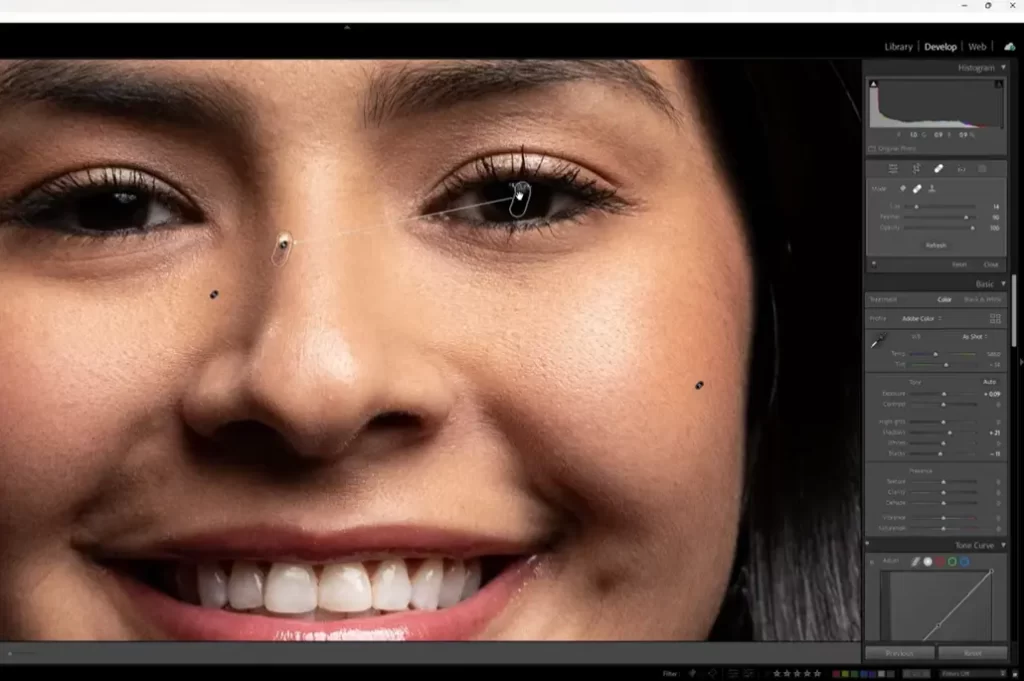
- Now apply this healing bandage to all your visible spots. If you want to be super careful, you can zoom in on the photo. This helps you see the small details and makes sure your skin looks smooth.
- Now and then, zoom out and look at the whole picture. Make sure you get rid of all the spots. The goal is to have a picture with no little marks.
- Using the bandage tool makes your photo look fresh and clean, ready for the next steps in making your skin look even smoother.
Smooth skin In a Lightroom
Let us use Adobe Lightroom to refine the skin.
You have two choices when it comes to making your skin smooth, velvety, and attractive. Option 1 is well-known, so let me first describe Option 1 as a gentleman. Option 2 is my preference.
Option 1: Using the Adjustment Brush and Sliders
- To use the Adjustment Brush tool, click on the brush icon in the toolbar. To adjust the brush’s size, use the slider or keyboard shortcut keys to make sure it fits the region you wish to smooth.

- Paint the entire area that you like to be smoothed. Now, it is up to you to choose wisely, keeping things natural by staying away from things like beards and eyebrows.
- This is how it will appear after choosing the skin; if not, you can select the “show overlay” option.

- Now, look for the sliders. There are a few important ones:
- Clarity: This controls the sharpness of the skin. Move it to the left to make the skin softer.
- Texture: Adjust this to make the skin smoother. Slide it to the left for a softer look.
- Sharpness: If you want to reduce any harshness, move this slider to the left.

- Once more, you can enlarge for better results. A skilled photographer should keep things in balance and try to avoid overly smoothing things out so much that they appear artificial and altered.
Option 2: Easy Way with Auto Face Selection and Skin Smoothening:
Now for my favorite and easiest way to retouch and smooth your skin in Lightroom: Auto Face Selection is a very simple option that lets Lightroom handle most of the work for you. It is like having a smart assistant that can quickly and easily make your skin look smoother without you having to do much work. Here’s how to use it:
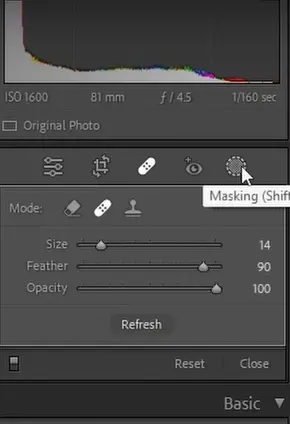
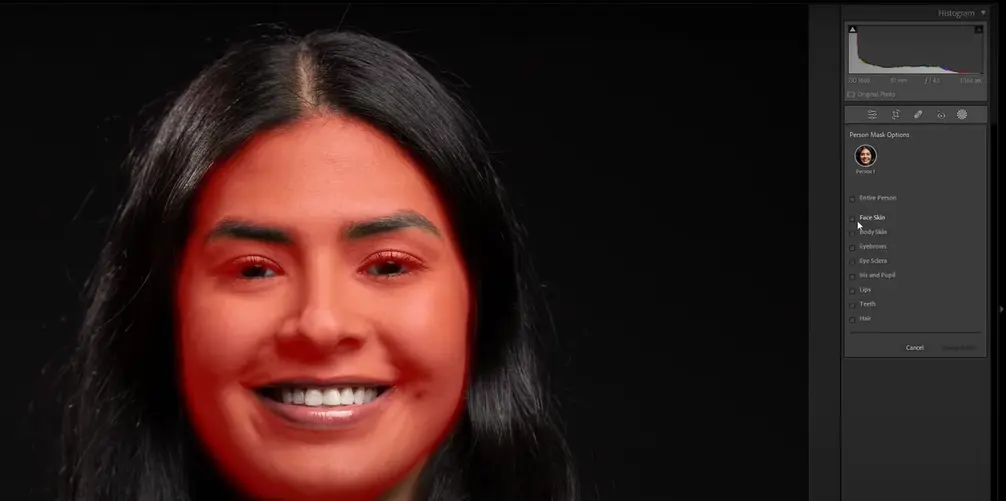
- Select “Person 1” as there is only one person in the photo and Lightroom will automatically identify and highlight the face when you click on the face of the subject to smooth out the skin. To begin the masking process, go to “Masking” in the right toolbar of Adobe Lightroom.
- Now select the choices for the face and body skin from the sidebar and let Lightroom do its work.
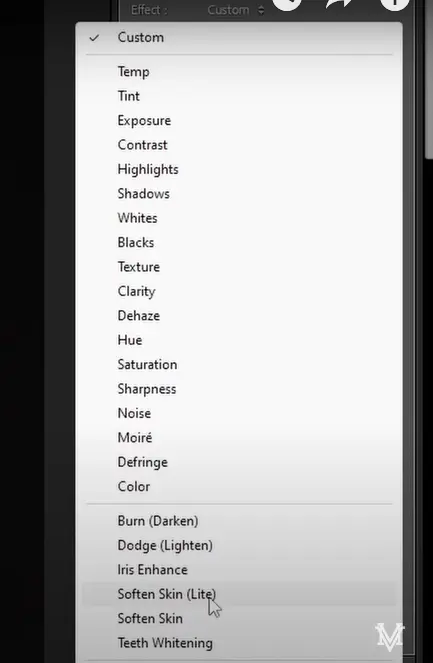
- “Soften Skin” or “Soften Skin Lite” is one of the pre-built presets in Adobe Lightroom. To access it, simply click the effects near the brush tool in the masking tool, select “Effects,” and then choose “Custom.” Soften Skin or Soften Skin Lite will be at the bottom of the list; in my opinion, Soften Skin Lite is the best option.
- After a while, review the image. If you think any areas require more attention, you may utilize the other tools or go back and make manual modifications. Automatically, clarity will jump to zero and sharpness to twenty-five.
- When you apply this preset, “Amount Slider” will display. You can customize the skin’s level of softness to suit your needs. You can now save these settings as your own preset for future use when you need rapid results.
Quick Summary of How to Smooth Skin in Lightroom
In conclusion, getting smooth skin in Lightroom is a simple procedure:
- Begin by eliminating imperfections with the bandage tool.
- Select between an easy automatic way with auto-face selection or a manual approach with the adjustment brush and sliders.
- To see the change, compare the before and after pictures.
Conclusion: How to Smooth Skin in Lightroom
To sum up, learning how to smooth skin in Adobe Lightroom is an invaluable ability that can take portrait photography to new heights of expertise. By following the thorough instructions in this blog post, you have learned the exact tools and methods that Lightroom offers to produce skin tones that are flawless and radiant.
Knowing how to smooth skin in Adobe Lightroom allows photographers and portrait enthusiasts to bring out the best in their subjects’ appearances without sacrificing authenticity. The powerful Detail panel, the Adjustment Brush, and the Graduated Filter work together to provide a one-stop shop for smooth, blemish-free skin tones.
When incorporating these techniques into your workflow for portrait editing, keep in mind the value of moderation and customization. Lightroom offers several tools that let you adjust the amount of skin smoothing, so your subjects still look unique but still look polished and refined.
Keep checking back for more enlightening advice and tutorials to improve your Adobe Lightroom skills! The path to portrait editing mastery is never-ending, and every new project offers chances to hone your skills and create artistically striking, perfectly edited portraits! Explore the creative potential of Adobe Lightroom and see how your portraits come to life with gorgeously smoothed and radiant skin!